Moodle Plugins directory: Source code Pro: Versions: 2.0.1 | Moodle.org
Source code Pro
Source code Pro 2.0.1
Code prechecks
Source Code Pro for TinyMCE Editor
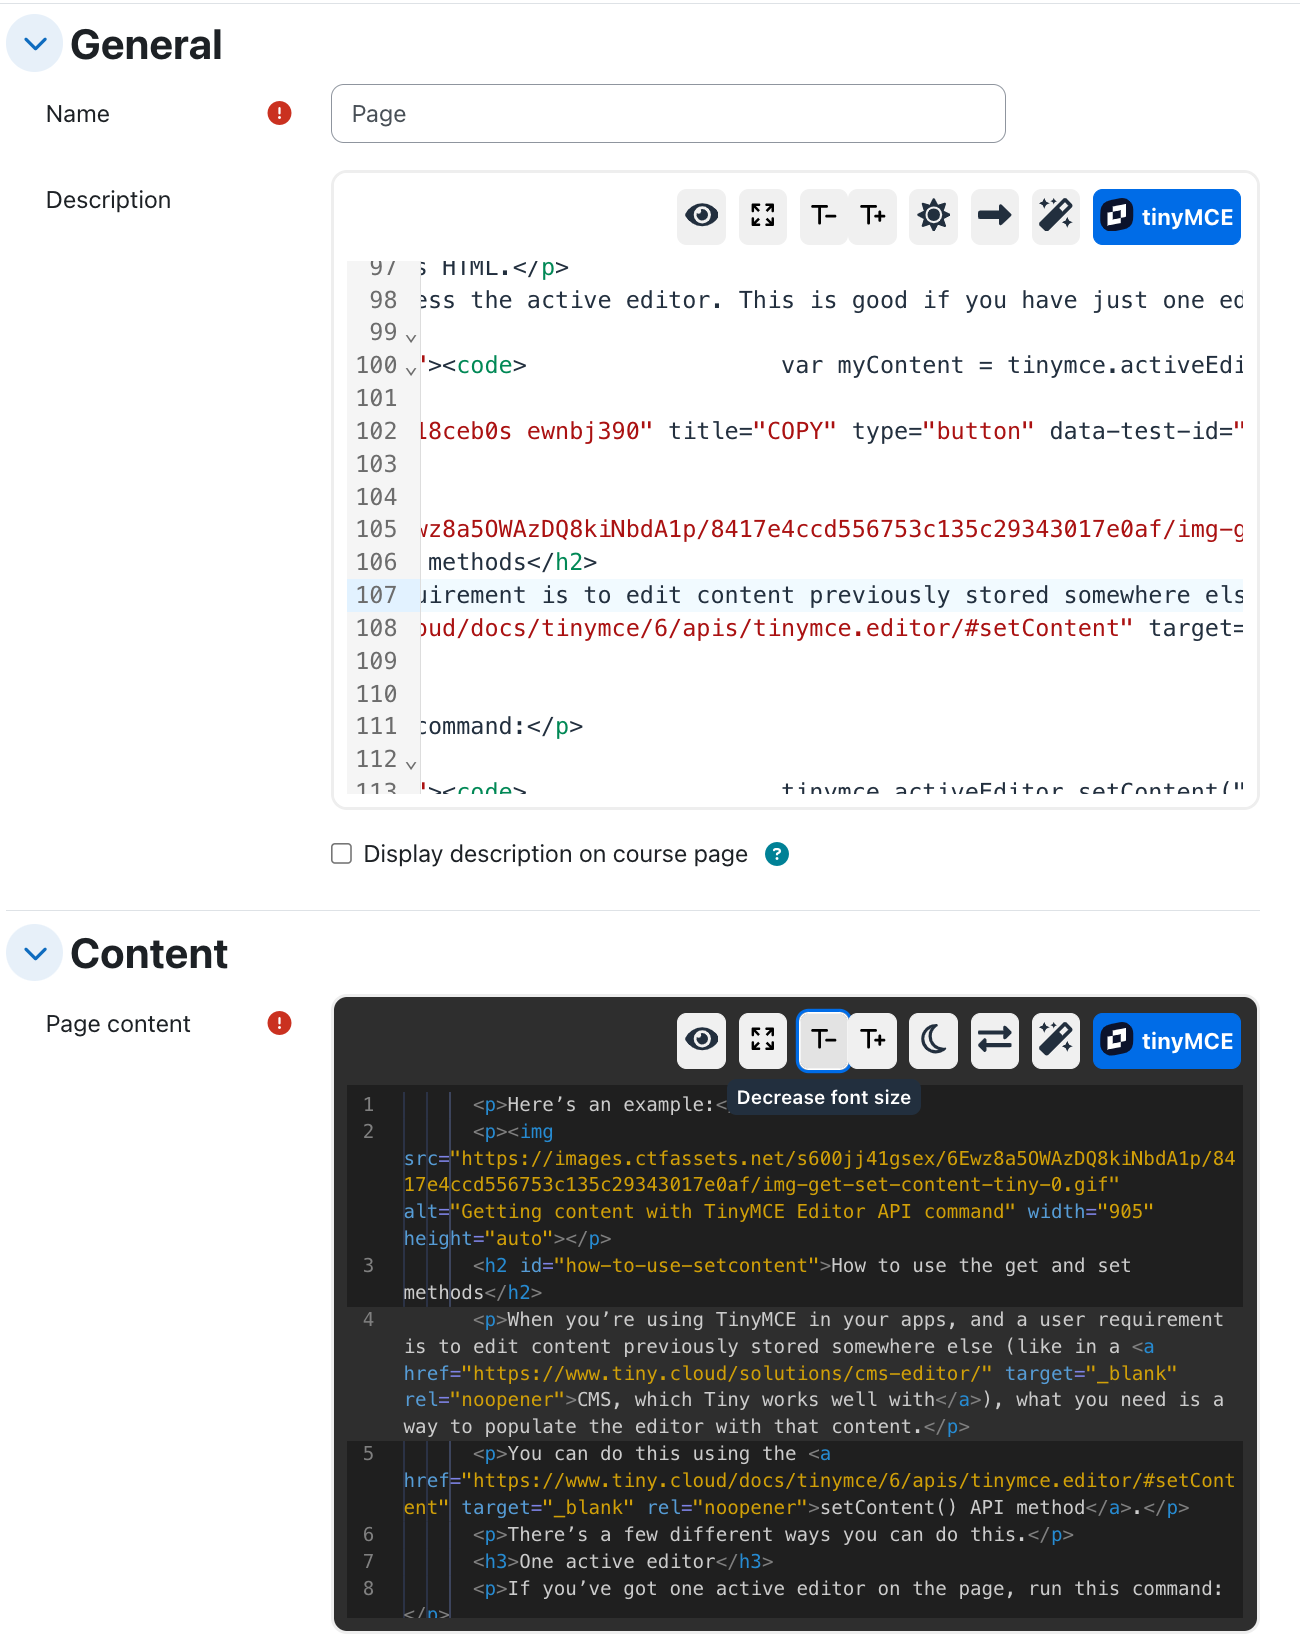
A Moodle plugin for the TinyMCE editor that enhances the built-in source code editor. This plugin leverages CodeMirror version 6 to provide features such as syntax highlighting, autocompletion, block folding, and more.
Compatibility
- Moodle 4.1 – 4.3: It replaces the default plain text source code editor.
- Moodle 4.4 and beyond: It provides advanced features compared to the default HTML code editor.
Features
- Syntax highlighting with line numbers
- Search and replace functionality
- Code formatting
- Cursor position synchronization with TinyMCE (since v1.1.4)
- Light and dark themes
- Toggle fullscreen mode
- New in v2.0:
- Dialog and panel UI modes
- Configurable font size
- Improved cursor synchronization
- Color picker
- VSCode-like minimap
UI Modes
The code editor can be displayed in two different modes:
- Dialog Mode: A single editor instance is displayed in a modal. Changes must be explicitly confirmed or rejected.
- Panel Mode: Multiple editor instances can be used simultaneously, with changes applied automatically.
An administrator setting allows choosing the default mode or enabling users to switch between both modes.
Key Bindings
Note: On macOS,
Altcorresponds to theOptionkey.
| Shortcut | Action |
|---|---|
Shift-Alt-M |
Toggle minimap |
Shift-Alt-W |
Toggle line wrapping* |
Shift-Alt-T |
Toggle theme (light/dark) |
Shift-Alt-P |
Format code |
Shift-Alt-D |
Save preferences as defaults |
Shift-Alt-A |
Accept changes |
Shift-Alt-C |
Cancel changes |
*Please note that line wrapping is always enabled in panel mode.
Installation
- Navigate to Site Administration → Plugins → Install plugins → Install plugin from ZIP file.
- Once installed:
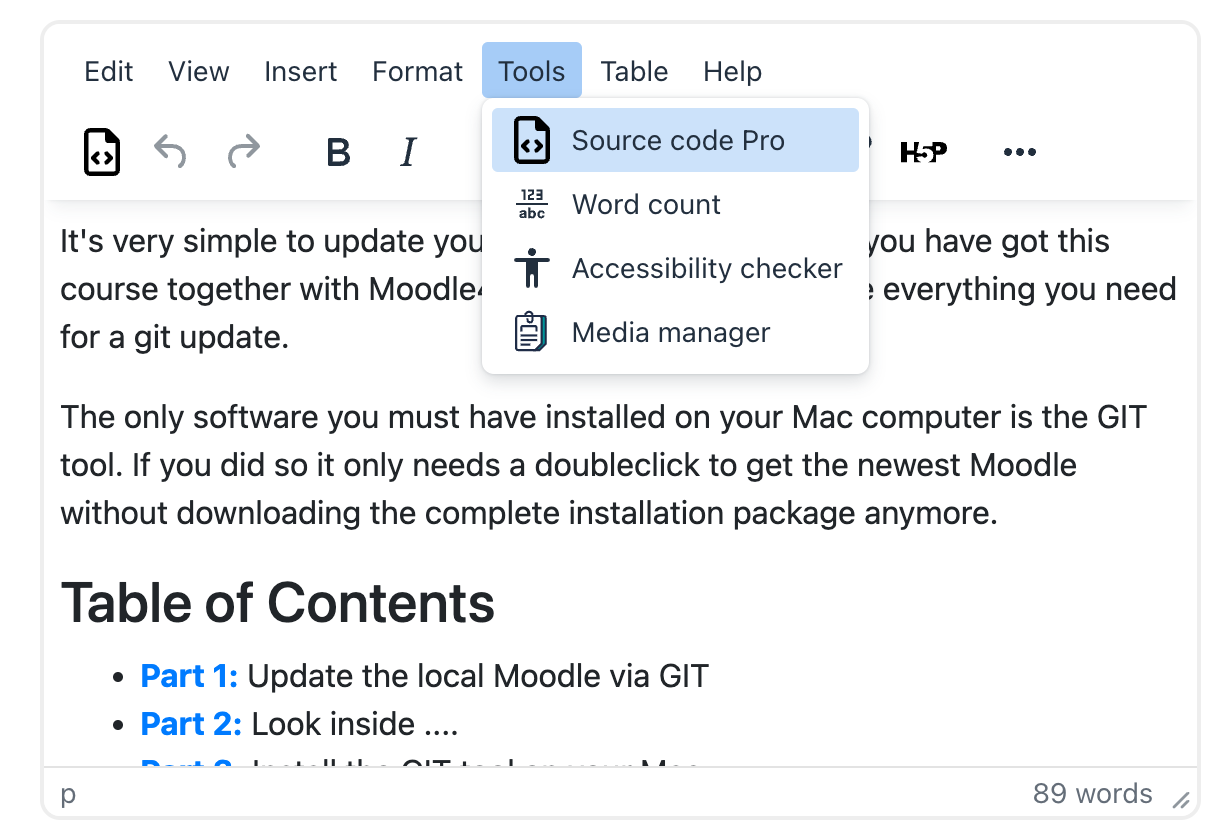
- The menu item "Source Code" will be replaced by "Source Code Pro."
- A new toolbar button will be added in the first position.
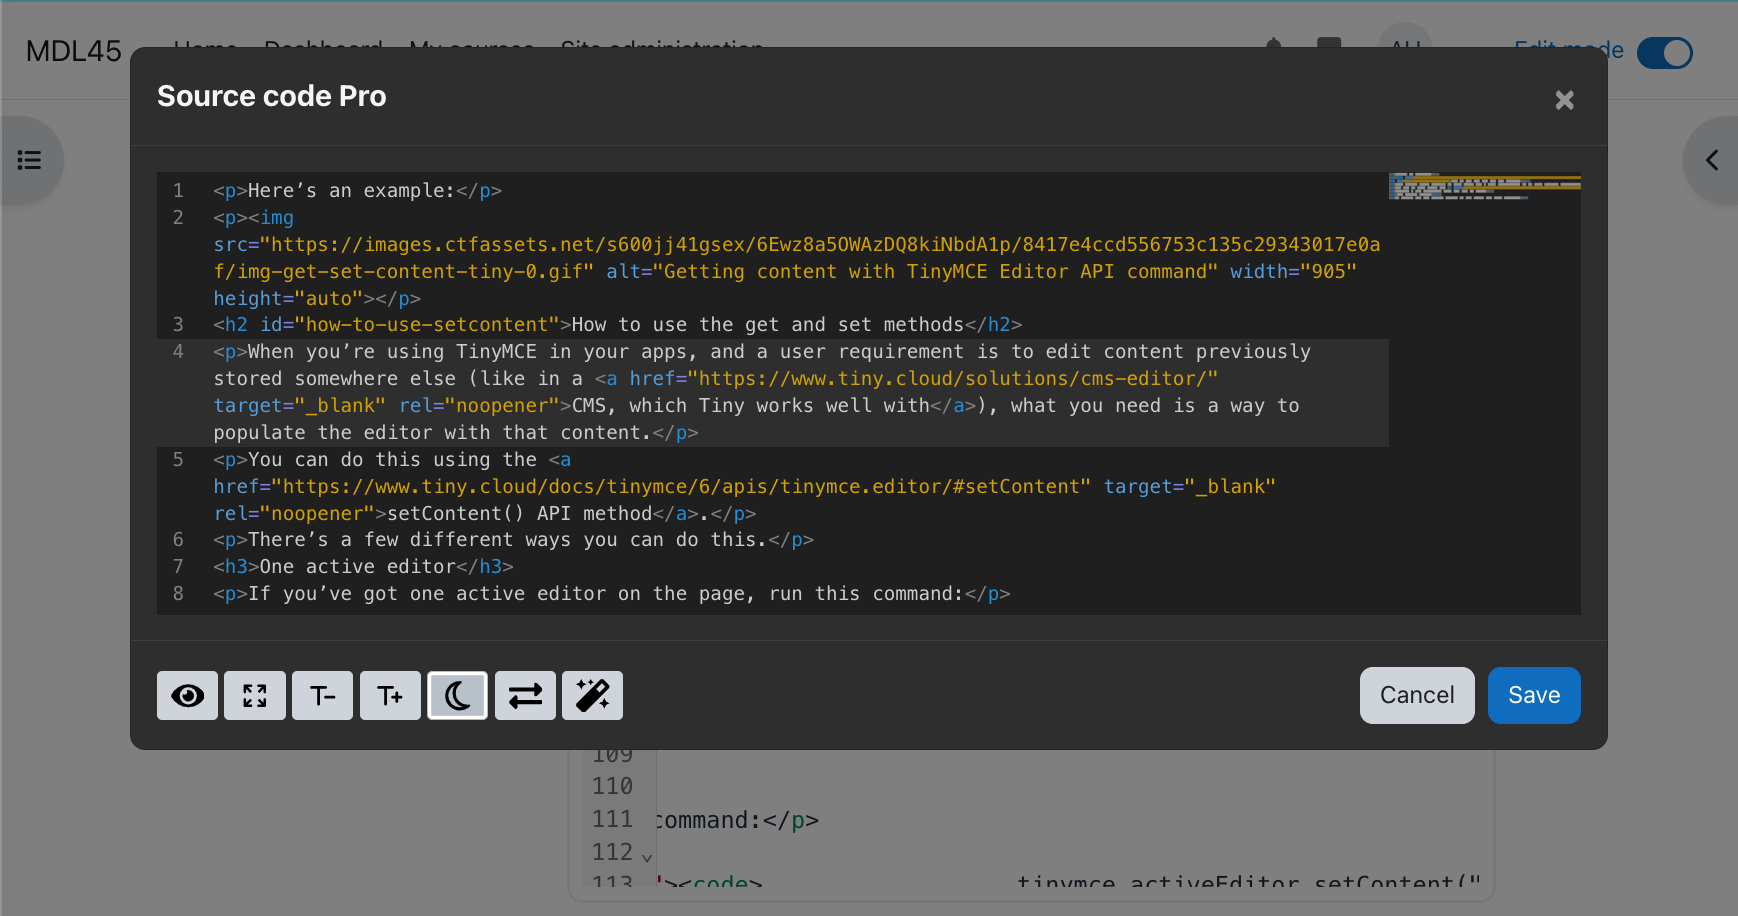
The source code editor (in dialog mode) opens in a modal dialog that can expand to fit the full window. It supports both light and dark themes and includes a toggle for line wrapping.
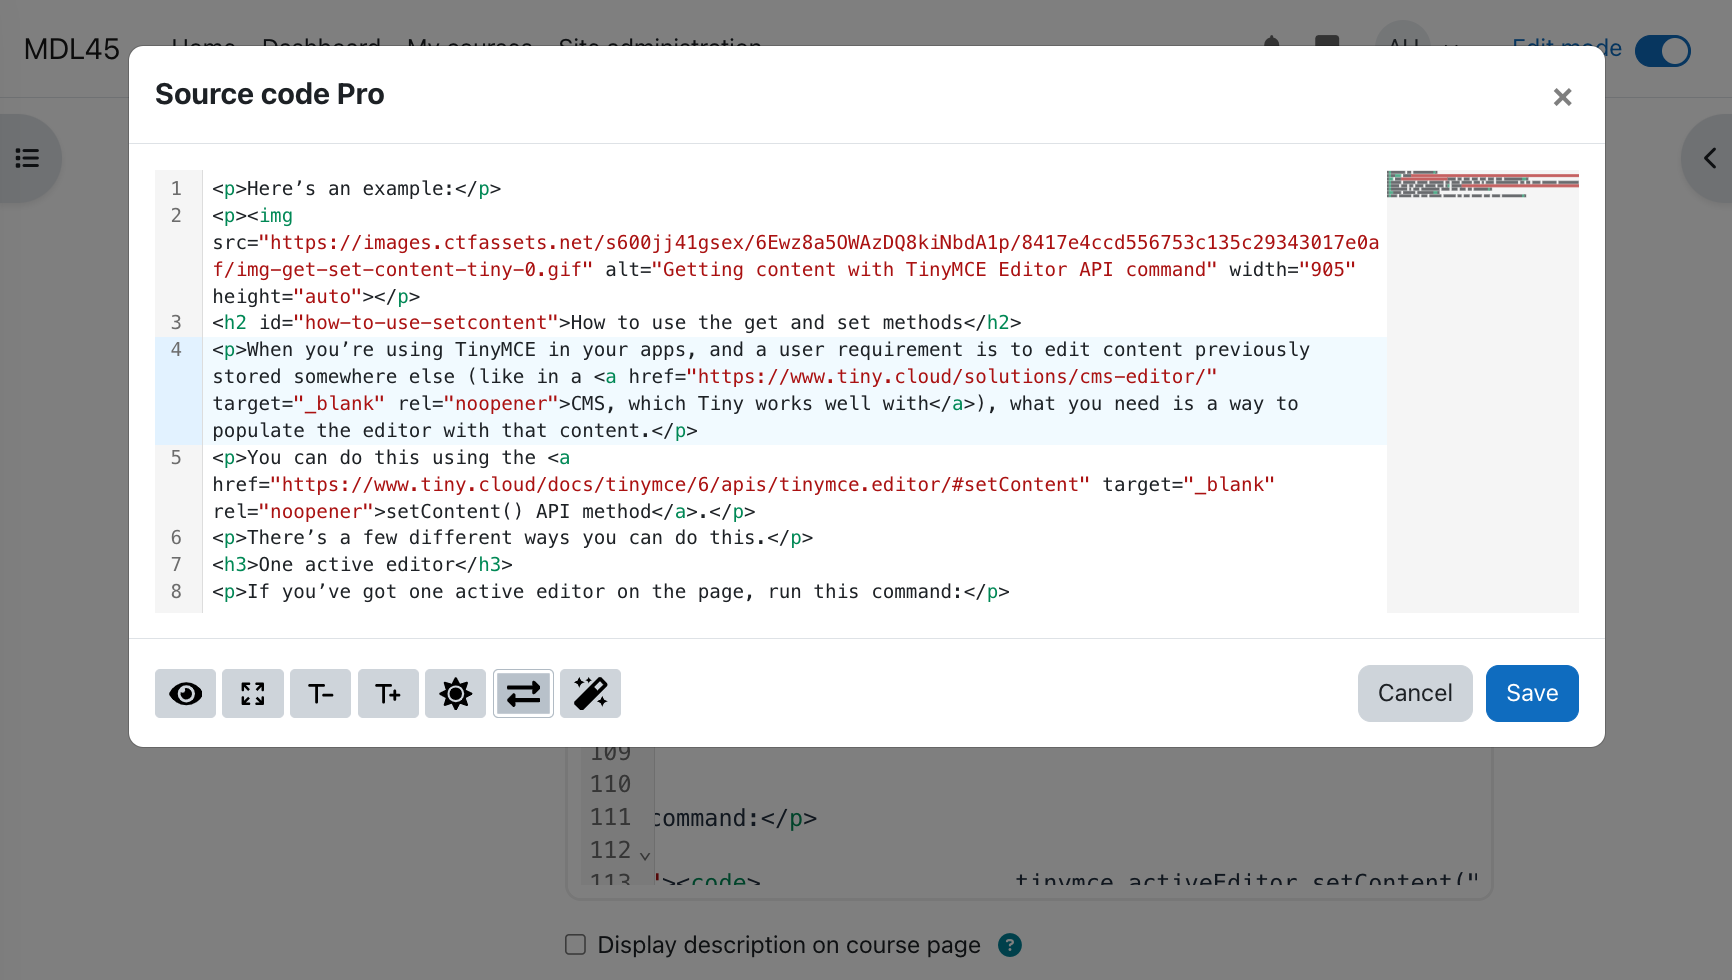
The plugin also integrates with the htmlfy library for automatic code formatting.
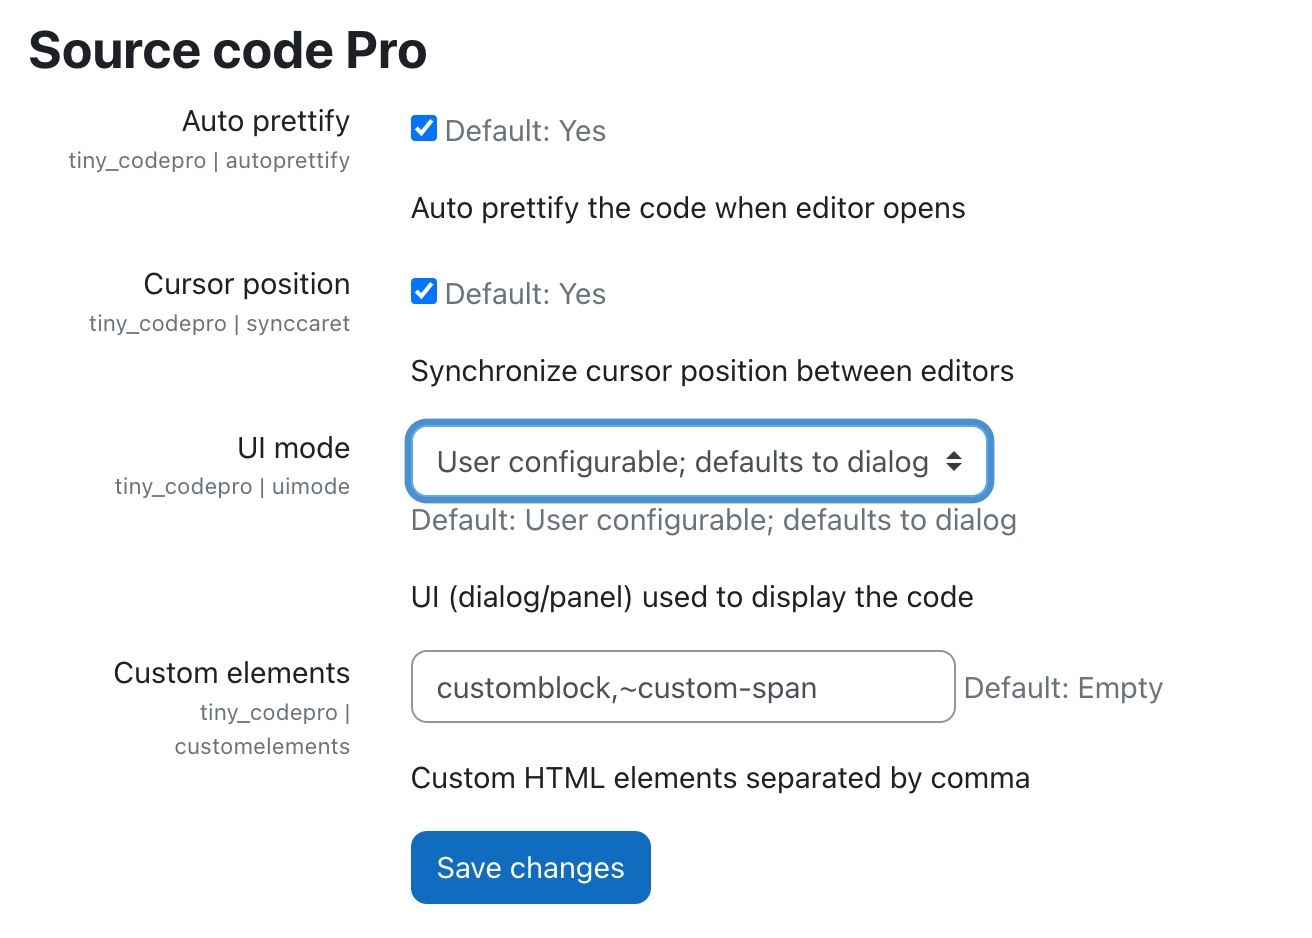
Configuration
Administradors can set these options
Additionally, the capability tiny/codepro:viewplugin controls visibility for specific roles.
Regular users can configure:
- Default UI Mode: Choose between "Dialog" and "Panel" mode.
- User Mode Switching: Allow users to switch UI modes.
- Theme Selection: Set a default theme or allow users to toggle between light and dark modes.
- Font Size Configuration: Adjust font sizes for better readability.
Build & Development
Generate AMD Modules
To compile source files from /amd/src into /amd/build, run:
npx grunt amd
Build CodeMirror with custom features
Refer to the documentation in libs/codemirror for details on modifying the CodeMirror dependency.
Credits
Thanks to CodeMirror and the awesome CodeMirror plugins developed by Replit. All icons are obtained from FontAwesome 6 free plugins. Many thanks also to the developers of the htmlfy npm module.
Enjoy coding with Source Code Pro!
Version information
- Version build number
- 2025020101
- Version release name
- 2.0.1
- Maturity
- 穩定版
- MD5 Sum
- 4bd819612b03eb5c284af9291dbe07dc
- Supported software
- Moodle 4.1, Moodle 4.2, Moodle 4.3, Moodle 4.4, Moodle 4.5
- The more recent release 2.1.0 (2025052601) exists for Moodle 4.1
- The more recent release 2.1.0 (2025052601) exists for Moodle 4.2
- The more recent release 2.1.0 (2025052601) exists for Moodle 4.3
- The more recent release 2.1.0 (2025052601) exists for Moodle 4.4
- The more recent release 2.1.0 (2025052601) exists for Moodle 4.5
Version control information
- Version control system (VCS)
- GIT
- VCS repository URL
- VCS branch
- master
- VCS tag
- v2.0.1
Default installation instructions for plugins of the type TinyMCE
- Make sure you have all the required versions.
- Download and unpack the module.
- Place the folder (eg "myeditor") in the "lib/editor/tiny/plugins" subdirectory.
- Visit http://yoursite.com/admin to finish the installation